How to Render and Export Videos in After Effects
Before we dive deeper into explaining how to render and export videos in After Effects, we should illustrate what rendering is. Simply put, this is the process of saving your work to be used or shared elsewhere. But in a little more detail, rendering implies combining all your visual and audio elements, effects, and settings into a final output file that can be opened and viewed in standard video players, on social media and YouTube, or in other video editing programs.
There are two ways to render in After Effects. The first of them is Render Queue, and the second one is Adobe Media Encoder. Render Queue is a panel where you add multiple compositions, set them to order sequentially, and customize the render and output settings for each of them. On the other hand, Adobe Media Encoder is an integrated encoding engine that works with After Effects. In this article, we will explain in detail how to render in After Effects using Render Queue.
How to render and export videos in After Effects using Render Queue
Optimize your project
To make the rendering process as short as possible, we recommend that you optimize your project. Here are our pieces of advice:
- Delete and consolidate unnecessary layers: fewer layers, effects, and cache memory will allow you to navigate the program faster.
- Reduce Project function of After Effects: in the After Effects Project Panel, select your composition, then go to the File > Dependencies > Reduce Project.
- Improve rendering speed by using solid-state drivers (SSD): including project files as well as render output. SSD provides faster read and write speeds compared to a standard Hard disk drive.
Add your composition to the Render Queue
Now, it's time to add your composition to the render queue. Here is how to export After Effects video:
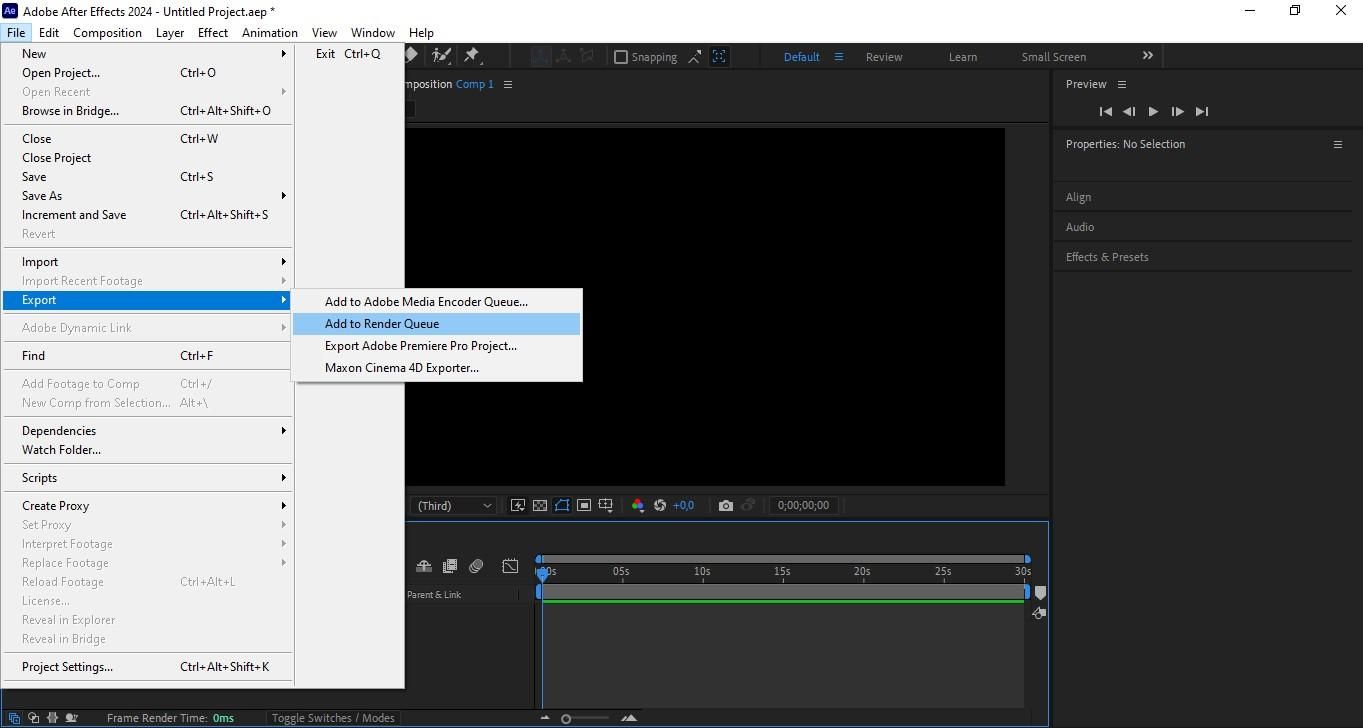
- File > Export > Add to Render Queue. This action will automatically open the Render Queue window.
- Click Composition from the top of the menu, and then click Add to Render Queue.
- Drag and drop each composition from your Project panel directly into the Render Queue. This is the most efficient way if you have multiple files.
- Use the keyboard shortcut CMD+CTRL+M.
Have you met Nexrender?
Nexrender is a tool that will help you automate the process of video creation! Save time, cut repetitive tasks, and focus on creativity while Nexrender handles the rendering. Try it now!
Customize After Effects render settings
Now it is time to customize the After Effects render settings. In After Effects, you can customize quality settings both for previewing while you work and for the final render.
- When it comes to preview quality: go to the Composition panel and in the dropdown choose between Full/Half/Third/Quarter. Full brings the best quality but slower performance, while Quarter means the fastest work but lower quality. As we mentioned, you can use Region of Interest to preview only part of the frame.
- The Render Quality setting is adjusted only when you go to the final render. This determines the final resolution and quality of the output file, regardless of how Draft or Full your preview was.
There are three ways to adjust the resolution in After Effects.
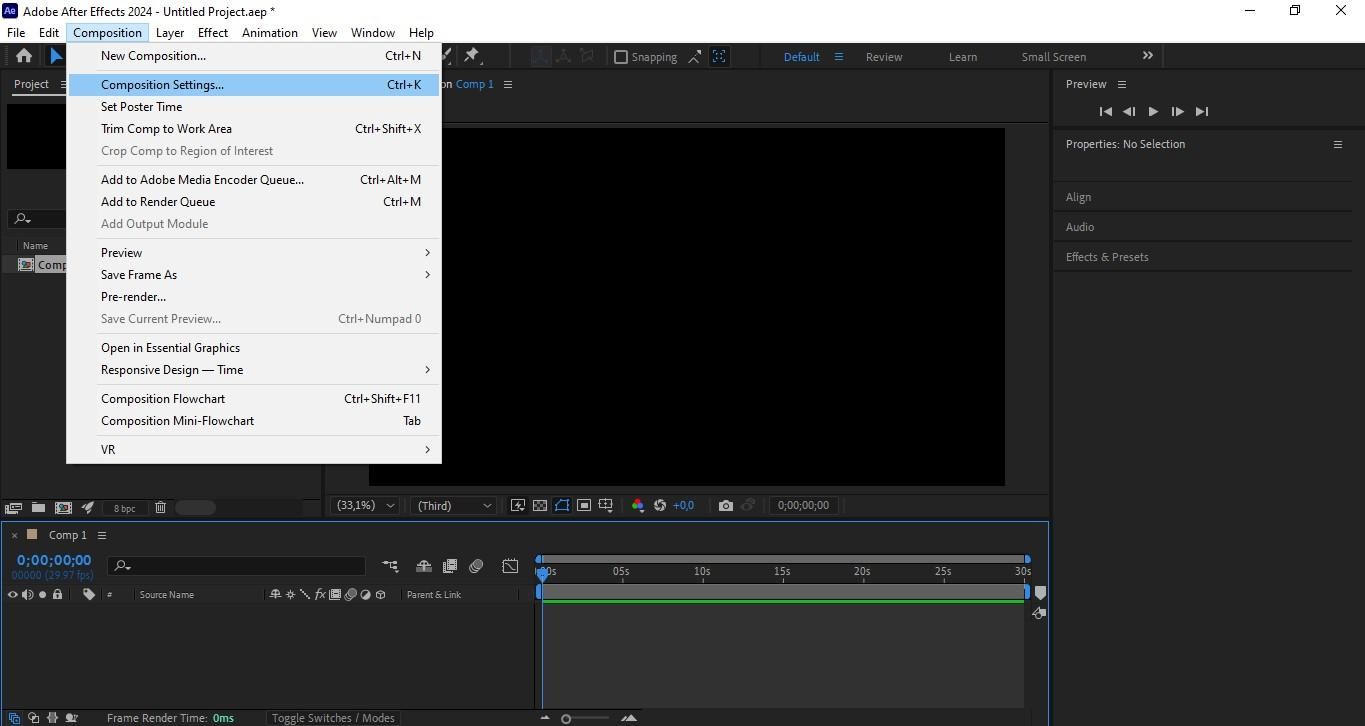
- The first method includes changing the entire composition’s dimensions. Click on Composition menu > Composition Settings. Adjust the Width and Height values to your desired resolution in the Composition Settings dialog box.
The second method brings a useful script for
, especially for batch operations. Navigate to File > Scripts > Scale Composition. Enter the desired width or height, or a scale factor, in the provided dialog box. Click Scale to apply the changes.
- Adjust the resolution for working in the timeline for better playback performance without changing the final output resolution. In the timeline panel, locate the resolution setting dropdown menu. Pick the chosen playback quality from the menu -Full, Half, Third, Quarter.
After Effects best render settings include modifying the codec. Select a composition, add it to the Render Queue, click the blue text for Output Module to open the settings, choose a format like QuickTime, and then click Format Options to select your desired codec and adjust related settings before rendering.

Choose a path to download your file
You will find the Output Module option below your composition in the After Effects Render Queue. Click, and then, under Format to the right, select how (e.g., QuickTime, AIFF, etc.) you'd like to download your file.
How to clear render queue in After Effects
There are two ways to clear the render queue.
- Window > Render Queue > select one or more items by clicking on them/ use Ctrl+A/Cmd+A to select all, and then press the Delete key.
- Edit > Clear in the menu bar – to remove them from the queue.
Troubleshooting rendering issues
After Effects not rendering full video
If After Effects doesn’t render the full video, there are several things you can do, but here’s the most common solution:
- In the Render Queue, check Render Settings > Time Span.
- Make sure it’s set to Entire Composition, not just Work Area Only.
Did you know that Nexrender provides a highly customized workflow for video creation? It can help you generate thousands of videos in no time.
If the render is not completing the action
Here’s what you can do:
- Check if it stops at the same frame every time. If yes, that frame/layer/effect might be corrupt or too heavy.
- Try soloing layers or disabling effects to isolate the problem.
- Pre-render or export that layer separately.
If the file too large
If your file is large, use this method:
- In the Export Settings, click the Video Tab and scroll to Bitrate Settings.
- Use VBR, 2-pass for best quality-to-size ratio. We recommend Full HD (1080p): 8–12 Mbps and 4K: 20–40 Mbps.
Missing audio after export
One of the most common things to do:
- In the Render Queue, click on Output Module (usually says Lossless).
- In the dialog: Look for Audio Output (bottom section) > By default, it’s often set to Off > Change it to On (or Output Audio) > Hit OK and re-render.
How to optimize After Effects rendering
Use an automation tool
Consider using Nexrender as an automatic tool for video creation. Nexrender will help you:
- Render multiple projects simultaneously, instead of just one project at a time.
- Split automatically a big project into smaller pieces, render them concurrently, and then automatically connect them back into one.
- Render on our more powerful machines when you need a lot of similar videos.
Pre-render complex parts
Pre-rendering complex parts will improve playback performance, simplify workflow, and accelerate final export. Go to Composition > Pre-render > adjust the render settings in the Render Queue to save the section as a high-quality video file like ProRes 4444.
Enable Multi-Frame Rendering
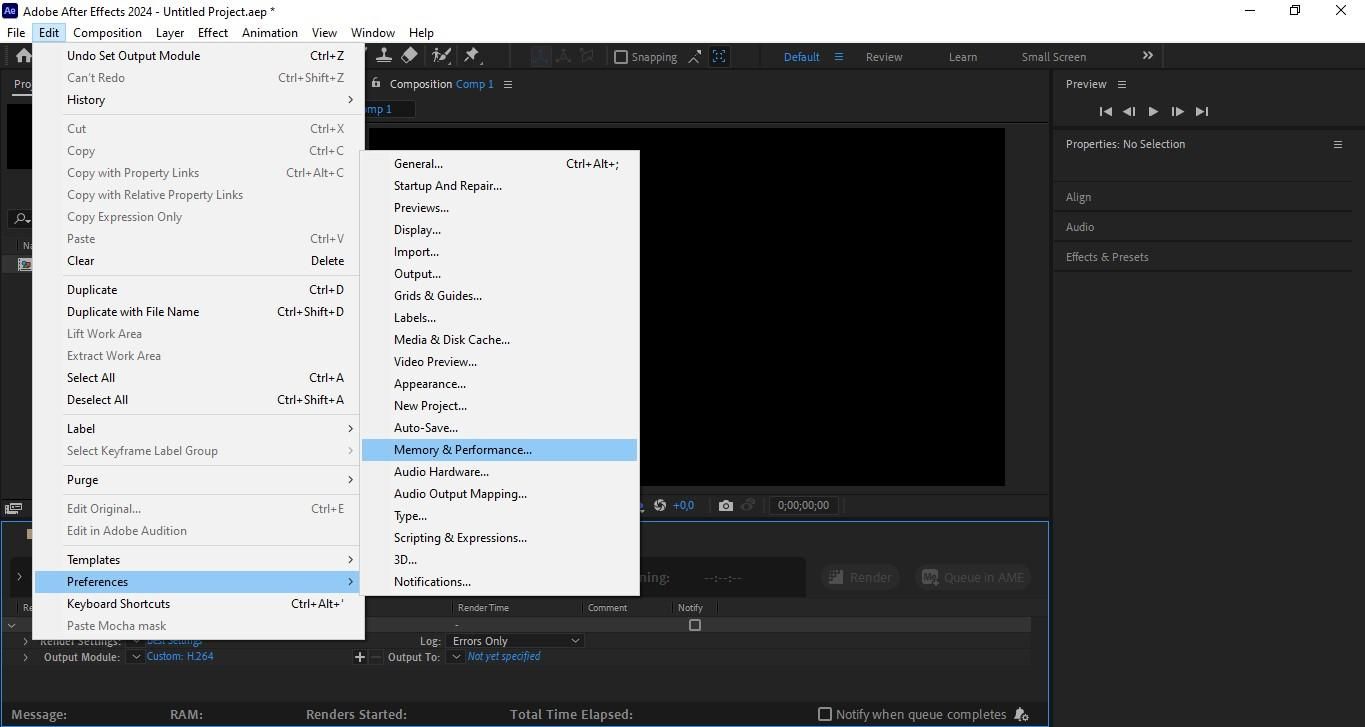
This feature will also significantly speed up rendering and previews, especially for complex projects. Click Edit > Preferences > Memory & Performance. To activate the feature, the checkbox Enable Multi-Frame Rendering should be checked, under the Performance section.
Enable Disk Cache
It’s easy. Click Edit > Preferences > Media & Disk Cache. Ensure the disk cache is enabled in the preferences window.
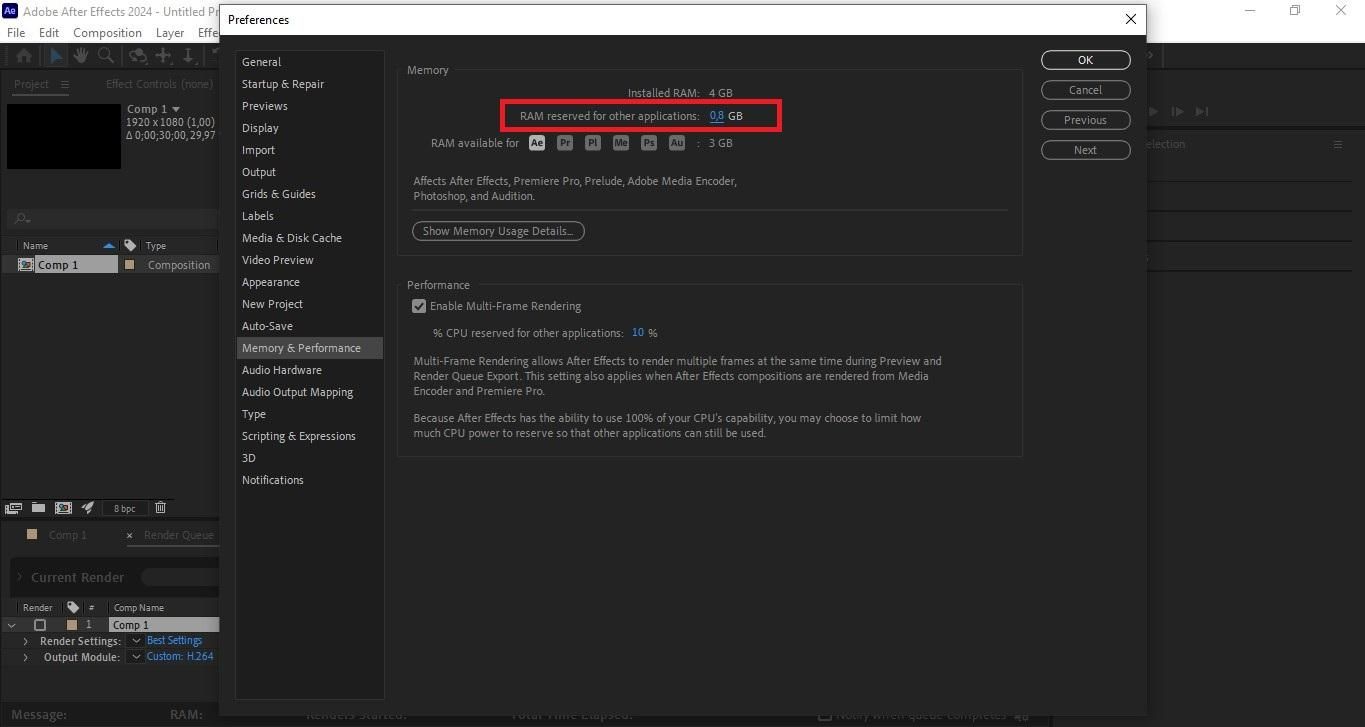
Allocate RAM Settings
Go to Edit > Preferences > Memory & Performance. Under the Memory section, reduce the value for RAM reserved for Other Applications. It will free up RAM for After Effects. We also recommend checking your physical RAM and enabling multi-frame rendering.
Conclusion
Rendering and exporting video files in After Effects are crucial processes to turn any composition into a usable file. For an even more efficient experience, check the work area and time span to render the correct portion of the composition. Consider file format and bitrate in order to achieve a better balance between quality and size. Furthermore, pre-render heavy layers and use proxies for optimization.
Experiment with different export methods to determine what suits your workflow. And never forget to test renders before the final export to bypass potential pitfalls.
FAQ
Can I render in the background while working?
Yes, for this, open your project in After Effects. Add it to the Render Queue. Then save and close the project. The next step is to open a stripped-down version of After Effects made for rendering only. It is the Adobe After Effects Render Engine. This program can render in the background while you keep working on another copy of After Effects.
Can I render several projects simultaneously?
Yes, you can render multiple After Effects projects simultaneously. Just add their respective compositions to the Media Encoder queue. Alternatively, you can use Nexrender Cloud to render multiple projects in parallel.
Why is my After Effects render taking so long?
The reasons are numerous and varied. We mentioned a few: complex compositions, resource-intensive effects, insufficient RAM, slow hard drives, and outdated hardware.