How to Clear After Effects Cache
The cache is a vital piece of your workflow. It is a temporary storage space where files that you create while working in After Effects are stored. These are files such as processed images, effects, and animation parts. Whenever you play a composition, After Effects automatically calculates any effects, motions, and layers that the composition requires. Rather than recalculating this information each time, it instead caches it on disk so that the next time that same scene is played, it will load from disk for the purpose of quick retrieval without the effort of a new calculation.
Over time, cache can take up a lot of space, sometimes going up to several gigabytes, thereby degrading the performance of After Effects. It can contain old or corrupted files that are both slow for the program and tend to produce display errors. Thus, it becomes important to delete the After Effects cache from time to time. This refreshes data and helps AE run faster.
Types of Cache in After Effects
There are two types of cache in After Effects – disk cache and RAM cache. Both serve to speed up the program, but they work in different places and in different ways. RAM cache is temporary storage in your computer's working memory. It calculates each frame and puts it into RAM to play back scenes immediately in After Effects. When the program is closed or the project is switched, the RAM cache is cleared. In essence, the RAM cache is just temporary storage used while working on a project.
On the other hand, a disk cache is a permanent version of the data that is stored on a disk - a hard drive or SSD. While the RAM cache is erased after you close the project, the disk cache saves the data and easily reloads it when you play the video again. The disk cache can be erased manually, in several ways that we will present in the following lines.
How to Clear Disk Cache in After Effects
Since it is recommended to delete your cache once a month, especially if you are working on large projects, here are two ways to do it efficiently. Both processes are very simple; just follow these steps:
Erasing disk space when After Effects is off:
- Close the program.
Locate the cache folder:
For Windows:
Go to This PC> Local Disk (C)> Users> the username folder> App Data> Roaming> Adobe> Common> Media Cache Files
For macOS:
Click Finder> Go> Go to Folder> Library> Application Support> Adobe> Common> Media Cache Files
- Select all the files in that folder.
- Press Delete. In case it says that a file cannot be deleted because it is “in use”, check if AE is really closed.
- Empty the Recycle Bin/Trash to completely free up space.
How to clear the After Effects cache within the program:
- Open After Effects
- Go to the top menu > Edit (for Windows) or After Effects (for macOS)
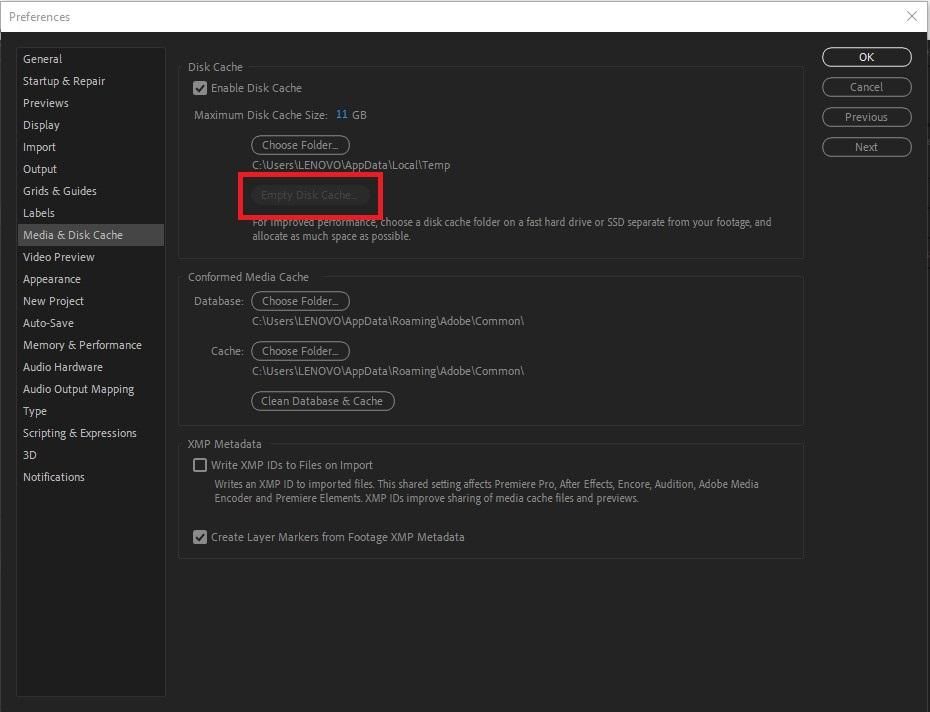
- Select Preferences > Media & Disk Cache. The Disk Cache option will then be displayed, along with how much space it takes up
- Click on Empty Disk Cache
- Confirm by clicking OK or Yes.
- This will delete all files from the cache that After Effects no longer uses.
Professional tip:
Nexrender is an excellent tool for speeding up and automating work in After Effects. The platform allows you to render projects at scale without opening the program and saves a lot of time in your daily work.
How to Purge RAM Cache in After Effects
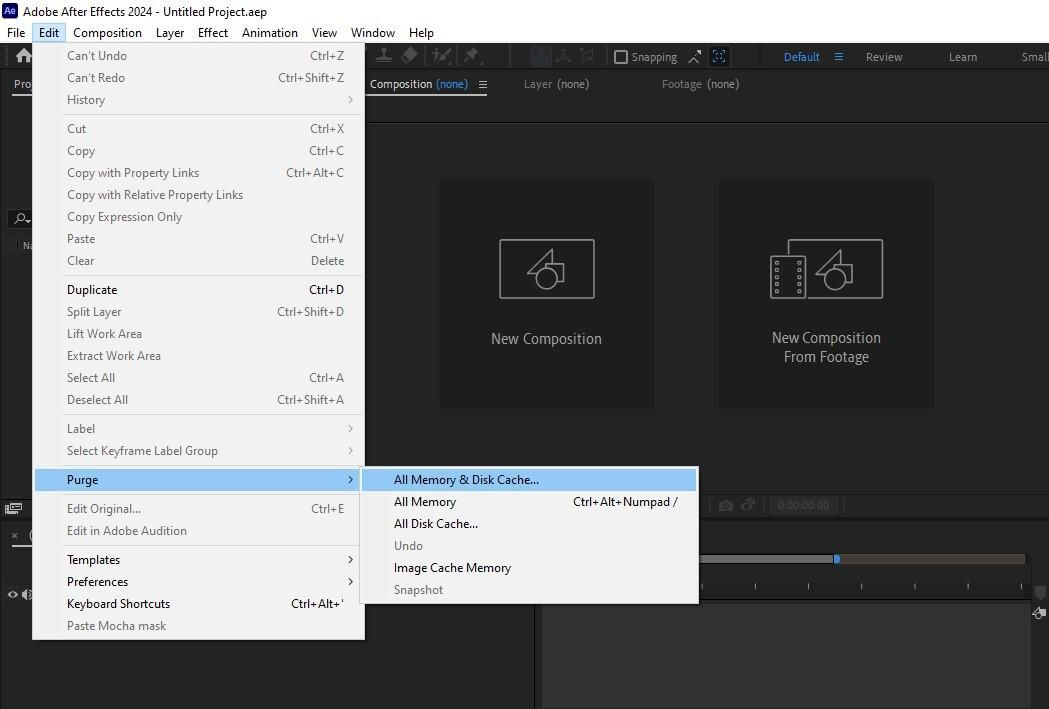
Just like clearing your Disk Cache, your RAM Cache also needs some clean-up now and then. On Windows, click on Edit in the menu at the very top. On a Mac, it's After Effects. From there, go to Purge > All Memory and Disk Cache. Upon clicking this option and hitting Confirm, the entire temporary data from your RAM Memory will be deleted by the program. Freeing up the space will enable the program to respond faster, if it has been slowing down or behaving weirdly.

How to Optimize Cache Settings in After Effects
Change cache location
Having the cache stored in a separate fast SSD or NVMe device is highly recommended. Never store it on the system drive, on a network location, or in folders synced to the cloud, as it would only slow down performance.
Provide the recommended size caps for common workloads
For HD projects, 50-100 GB of cache is sufficient, for 4K – 100-250 GB, and for 8K – more than 250 GB. Please note that these values depend on the project's complexity and available space. We advise you to always leave some disk space free to keep the system and program stable and uninterrupted.
Identify the settings that play a key role
If the space fills up, setting media and disk cache preferences plays a key role. Reduce the max cache size in the settings like this:
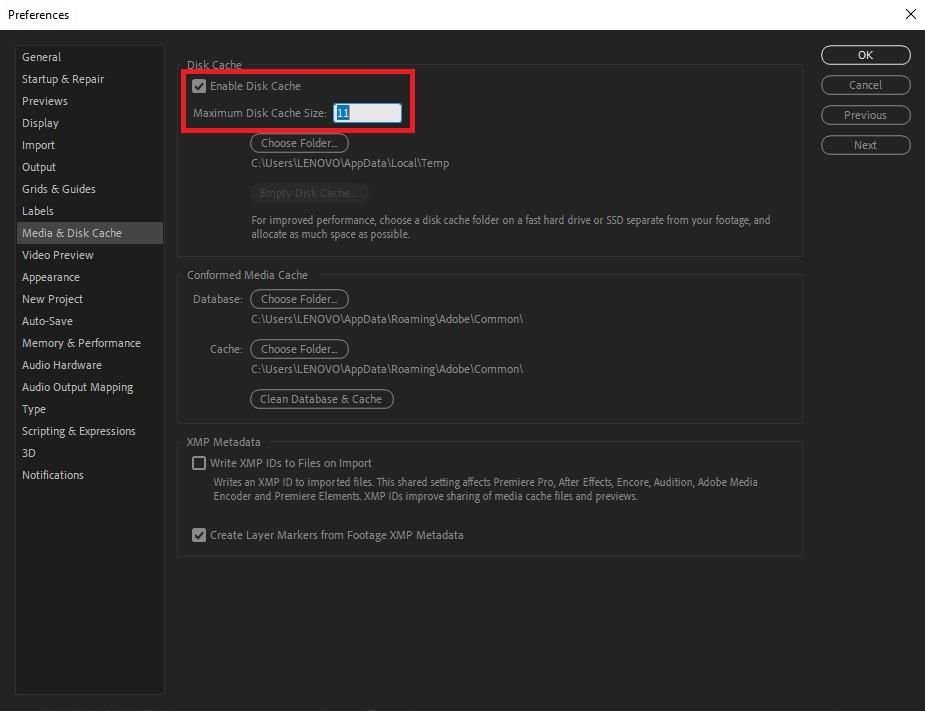
For Windows: Click on Edit > Preferences > Media & Disk Cache.
From the top menu for Mac OS, go to After Effects > Preferences > Media & Disk Cache. The current window will give you access to Disk Cache, where the Maximum Disk Cache Size is shown. Move the slider to the left or manually enter a smaller value, then click OK.
You can also enable Cache Frames While Idle. After opening the top menu, click on Edit > Preferences > Media and Disk Cache (for Windows) or After Effects > Preferences > Media and Disk Cache (for macOS). The new window has the option for Cache Frames While Idle, which should be selected, and then press button OK to save the changes. You may want to go back to the Performance section and find the option for Enable Multiframe Rendering, tick the box next to it, and then press Okay to save these changes.
Define RAM allocation strategy
In the settings, you can determine how much RAM memory AE uses and how much space you leave for other programs. More cache means faster and smoother previews, while less memory will be freed for other processes. Above all, one must find this balance between system stability and rendering performance.
Professional tip:
Nexrender is a great tool for automating video creation and editing in After Effects. It also allows the integration of custom scripts and plugins, which significantly speeds up the production process and simplifies the workflow.
Exclude cache folders from antivirus/indexing for smoother I/O
Add these folders to the exceptions list in your antivirus software and exclude them from all system indexing. It will prevent continuous scanning of these folders, which usually slows down the program's operation. This improvement will have a significant impact on both speed and stability in After Effects.