How to Render Multiple Versions of One After Effects Template
Batch rendering in After Effects enables continuous rendering of multiple tasks without requiring artists to monitor the process or start each render file manually. The system eliminates the need for repetitive export tasks by transforming them into an automated workflow which enhances the efficiency of production processes. It provides stable and predictable output because all renders are performed under identical technical conditions.
It is particularly effective in projects where the same visual template is used with variable text, images, or video content. It is also essential in situations that require rapid delivery of versions of the same video. It is ideal for workflows where rendering is planned in advance and performed automatically in the background.
Keep reading because in the following lines we will present you with two ways to render multiple versions of one After Effects template. First, we will introduce you to a specialized automation tool for rendering multiple versions of AE templates, and then we will explain how native After Effects settings work.
How to render multiple video versions with Nexrender
Nexrender is used to connect After Effects templates to pre-prepared datasets, allowing numerous videos to be generated without manual work in the After Effects interface. Instead of manually rendering each composition, Nexrender takes over the process and turns AE into a scalable render engine.
1. Design AE templates ready to be created in multiple versions
The AE project should be conceived as a central template intended for reuse, not as a one-off animation. The compositions and layout must be flexible enough to accommodate different variants of the content, without additional design interventions. All elements that differ between versions must be clearly defined and consistently named to avoid errors during automated rendering. This approach allows the same visual identity to be applied to a large number of output videos.
When naming layers, use general names like “Product Name” instead of something specific like “Cheese Gouda”. If the text might change in length, set up how it should behave: should it wrap to a new line, get cut off, or shrink to fit? And if you think future assets might be of different sizes, make sure to set up autoscaling- either directly in the template with expressions or using Nexrender’s handy nx:layer-autoscale feature - so everything always looks right.
2. Organize your content
There are two ways to do this. You can either store all your data in a personal database and trigger renders through the API (check out the Nexrender technical documentation here), or you can organize your data in a spreadsheet.
In the spreadsheet, each column should correspond to a dynamic layer in After Effects. For example:
A column named “Product Name” might contain values like Coffee Nespresso, Apples, Chocolate Milka, etc.
A column named “Product Picture” would contain links to the product images, stored on S3, Google Drive, or another accessible location.
Fill in the table with all the data for your different video versions - this makes managing multiple outputs clear and straightforward.
3. Configure Nexrender workflow
Upload your template through Nexrender’s simple, easy-to-use dashboard. You can add files in .aep, .mogrt, or .zip formats. If you’re going with a .zip file, just make sure all your media and audio are tucked inside a folder called “Footage”- that way everything will load correctly.
All fonts used in an After Effects template need to be made available to the Nexrender environment before rendering. Custom fonts are uploaded separately from the template and must be in .ttf format. It is important to check that the font names in the AE project exactly match the available font files, to avoid default font substitutions or rendering errors.
Connect your Google Spreadsheet or upload your csv to Nexrender. Before mass rendering, a test render of one version is recommended. After confirming that the fonts, text and assets are correctly linked, the workflow can be run for multiple render jobs in batch mode.
4. Render multiple videos in After Effects automatically
By launching your renders, you start the process of automatic rendering of all defined versions. Each render is performed in turn, without the need to manually open AE or additional interventions. Batch allows for the efficient production of a large number of videos in a short period of time.
5. Final Control and Scaling
You must verify the output files after rendering is complete to confirm both technical and content accuracy. The established workflow allows for simple expansion to additional versions while enabling its application in upcoming projects. In this way, the renderer becomes a key tool for scalable and repeatable video production.
How to render bulks of videos with the After Effects Render Queue
1. Prepare the composition for rendering
Each version of the video must exist as a separate composition in the After Effects project. Compositions can be variations of the same template - different text, images, or duration. Before rendering, check that all compositions are final and properly named for easier navigation in the Render Queue.
2. Add a composition to the Render Queue
Understanding the After Effects rendering pipeline helps ensure that each composition is processed correctly and efficiently in the Render Queue. Select a composition in the Project Panel or Timeline. Composition > Add to Render Queue. Repeat the process for each composition you want to render. All compositions appear as separate items within the Render Queue panel.

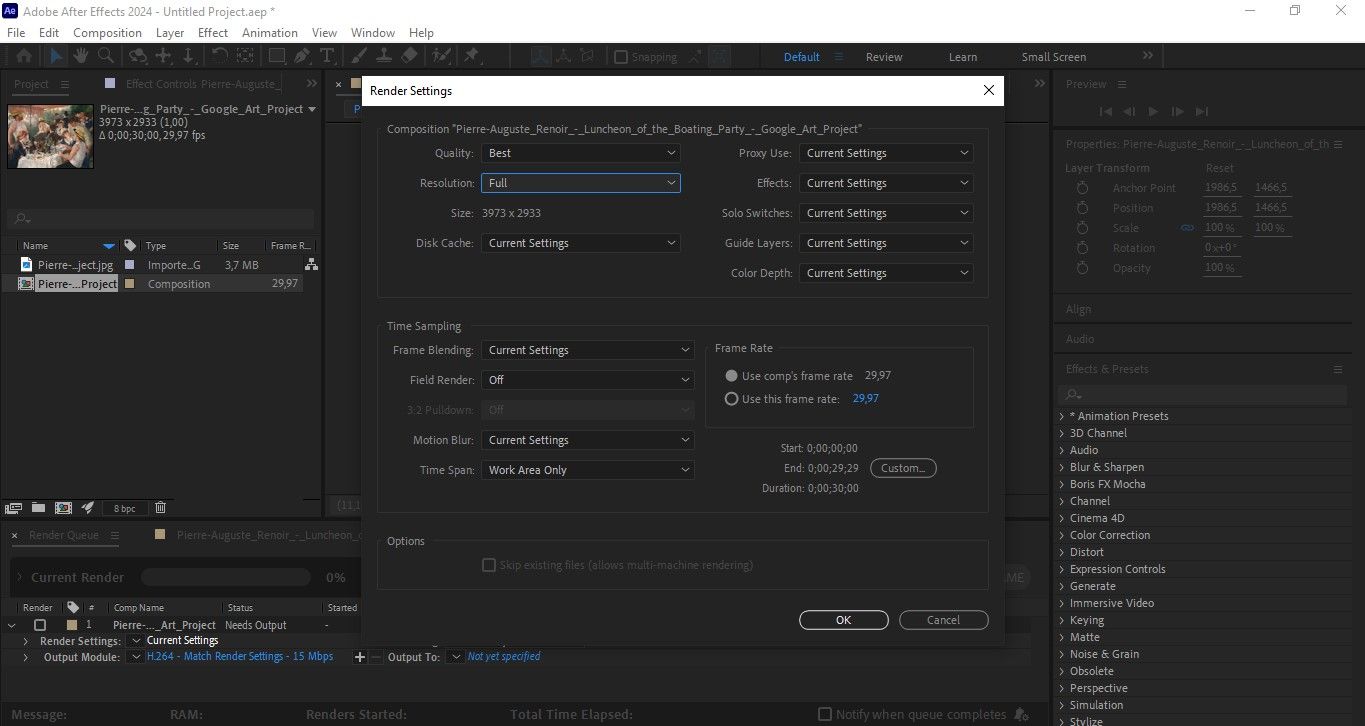
3. Set render and output options
For each item in the Render Queue, set: Render Settings (resolution, frame rate, quality). Output Module Settings > Format > QuickTime or H.264. Format options > Codec. Output to > Save As - select the export folder and file name for that version of the video.
4. Organize and Control the process
The Render Queue enables concurrent operation of multiple rendering tasks, yet their processing occurs in a sequential manner. Users have the ability to interrupt rendering operations at any moment to resume or terminate the process. The rendering operation requires continuous operation of After Effects throughout the entire rendering period.
5. Start rendering
When all items are set correctly, start the process by clicking Render. After Effects renders each composition in the Render Queue in turn. When finished, all video files are located in the defined output folders.
Common mistakes when automating After Effects templates
1. Hard-coded textual layers
AE template automation can significantly speed up the video production process, but problems often arise when projects are not adequately prepared. One of the most common mistakes is the use of char-coded text layers. When text is entered directly into a composition and is not linked to an external source or expressions, automatic content replacement becomes impossible. This limits the scalability and reuse of templates.
2. Uncontrolled expressions
Another common problem is uncontrolled expressions. Automatic rendering breaks when expressions use local paths, non-existent variables, or specific compositions. The reliable operation of automation systems depends on expressions that must remain predictable and match consistent patterns while working across all computer systems and file paths.
3. Missing fonts and assets
Missing fonts or assets are another problem that can occur when automating AE templates. If some files, videos, or fonts are unavailable, the automated render may stop. All required resources must be properly referenced and available to all machines participating in the rendering process.
4. The lack of rendering tracking
Rendering monitoring should not be neglected. Without logs, notifications, or a monitoring system, errors can go unnoticed, leading to delays in video delivery.
5. Rendering everything on one machine
Keep in mind that trying to render all versions on a single machine limits speed and scalability. A large number of video versions requires task distribution, either across multiple local computers or a cloud solution, to ensure an efficient and reliable workflow.
Nexrender helps prevent these issues by introducing a method that automates text and asset replacement through controlled processes, eliminating manual work in After Effects. The automated rendering system, together with process monitoring and multi-machine rendering capabilities of Nexrender, creates a workflow that remains consistent and can handle increased demands.